Mechanical pencils are known to be the best companions of several people, from students to professional artists. They are quite durable but require proper maintenance.
The lack of said maintenance can result in a few hiccups, commonly lead jams and bent tips.
Both problems can be solved with the help of some tools, a clean-out rod, and a 0.5mm rod. So, let me show you the best techniques to fix a jammed mechanical pencil.
What Causes Mechanical Pencil Jam?

A jammed mechanical pencil is a common problem people face, but what causes it? Two words; poor maintenance. It is the most straightforward answer to the question. Mechanical pencils are not robotic machines that can fix problems by themselves. If a lead inside the pencil is lodged, it stays put until it gets jammed.
You must take the pencil out and replace the lead to use it again. This is why you must change the lead now and then to keep your pencil functioning properly.
However, If you’re facing the issue of a mechanical pencil lead jam currently, don’t worry. Let me show you how you can clear the jam effortlessly.
Things You Will Need
To clear the mechanical pencil lead jam, you will need some materials. The initial item you will need is a stiff, sturdy wire that is long enough to be inserted into the pencil’s tip. Certain pencils already contain a “clean-out rod” or cleaning pin, which can be found underneath the eraser. Clean-out rods are also one size fits all, so if you have one, it will be plenty to clean all your pencils.
Certain eraser refills come with a clean-out rod, so even if it doesn’t fit your pencils, it can be kept to clean them.
If you don’t own a mechanical pencil with a clean-out rod, you can DIY one using twist ties. You can usually find twist ties on bread bags. The twist ties come with a paper/plastic coating that makes them more malleable.
Strip off the outer layer, and you will be left with the wire exposed. The inner wire of the twist tie will be the right size to clear a lead jam in a 0.5mm mechanical pencil or larger.
As a last resort, if you don’t own a clean-out rod or a twist tie, you can use a piece of pencil lead.
Warning
Note that I do not recommend using a pencil lead to clear the jam unless you have no other alternative. Leads are extremely fragile and can make the situation worse if it breaks off within the pencil.
How To Clear A Mechanical Pencil Jam
Once you have all the materials, the clean-out rod, twist ties, or the pencil lead, you can start the clearing process. Firstly, take out any remaining pencil lead from the mechanical pencil. This is to ensure they don’t fall off or hinder you when you clear the lead jam.
I have two techniques that I recommend for cleaning out lead jams. Both techniques are meant for different pencils, though the first is more effective. If the initial technique does not work for your pencil, try the second one.
1. First Technique
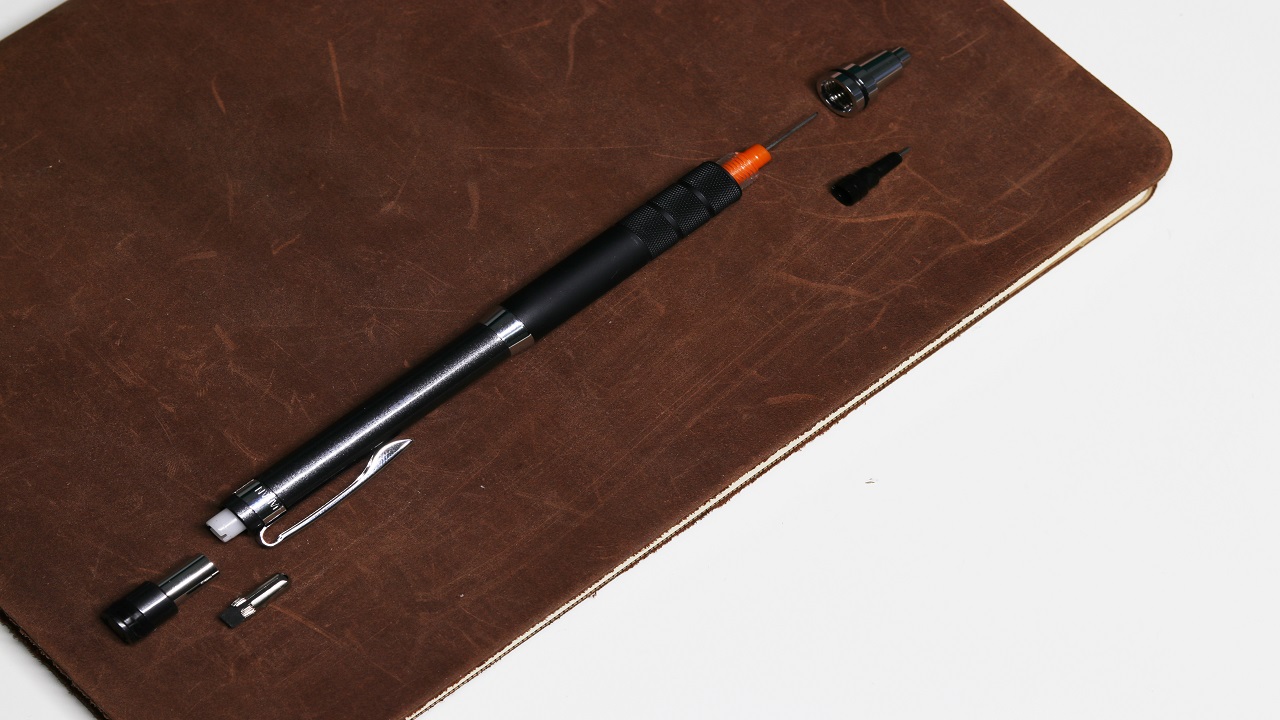
Begin by unscrewing the nose cone of the jammed pencil to see if the lead sleeve is attached to the cone. If yes, use a clean-out rod or twist ties, and insert it into the tip of the nose cone. Using the tools, push out any remaining broken lead and clear the nose cone.
The next step is to examine whether the clutch mechanism of the mechanical pencil has been exposed. You can remove the nose cone where you will find the clutch. A pencil clutch typically consists of a pair of prongs or jaws held in place with the help of a metal/plastic ring. The engineering term for this kind of clutch mechanism is “chuck.”
If you own a pencil with this specific clutch mechanism, find its push button and hold it down. Simultaneously, use your fingernail to push the ring back from the prong tip.
This creates a separation between the prongs and gives space for any remaining broken lead pieces jammed inside to fall out. You can also use a clean-out rod or twist ties to check the clutch mechanism for hidden broken lead pieces.
Once you’ve pushed the pieces out, open the lead chamber of the pencil and give the pencil a shake. Most, if not all, broken pieces of pencil lead will fall out. If you do not remove them before using the pencil again, these dislodged pieces can end up causing another jam.
After clearing the pencil, attach the nose cone and add a new, whole lead to the pencil. Use the push button to extend the lead. If it works, you have successfully fixed your mechanical pencil jam!
2. Second Technique
If your pencil has a different clutch mechanism or nose cone, the first technique might not work. So, try this technique instead.
Keep the pencil tip facing up while pressing the push button. This will help open the clutch mechanism inside the jammed pencil and enable you to clean it. Proceed to insert the clean-out rod into the pencil tip. Make sure you move it in and out a couple of times to remove the maximum number of lead inside the pencil.
There may also be some hidden lead bits that are jammed, so pushing the clean-out rod further will help dislodge them.
Once you’ve cleaned the front tip, open the lead storage chamber of the pencil with the tip facing up. As mentioned in the previous technique, shake the pencil thoroughly, so the pieces fall out instead of causing another jam.
To test if the pencil works or if you’ve cleared the jam, insert a new pencil lead and use the push button to extend the lead. If it extends without any issue, the lead jam has been cleared.
Fixing Lead Jam In Multi Pens
A multi pen is a mechanical pencil with more than one pencil lead of varying sizes. Though multi-pens are designed to hold more lead simultaneously, two leads can clash, causing a jam. In case you notice a lead jam in a multi-pen, try taking off all the leads from the storage tube except one.
If the problem is not solved by removing the leads, here is another technique that might help.
Similar to the second technique mentioned above, hold down the push button of the multi-pen with the top facing up. The push button is the one that is used to extend the lead. Doing this will enable the clutch mechanism within the pencil to open up and allow you to clean it effortlessly.
Insert a clean-out rod into the mechanical pencil’s tip, and move it back and forth a couple of times. This will effectively remove any bits and pieces of broken lead hiding within the pencil. Once the bits are dislodged from the pencil, open the lead compartment and shake it thoroughly.
This is crucial to prevent any pieces from making their way back into the pencil and causing another jam. You can check my mechanical pencil guide to remove the multi-pen component correctly.
As mentioned above, to check the pencil, add a new lead to the pencil and extend it. If it does that without any issues, your pencil lead jam is fixed.
How To Fix A Bent Tip
All of us tend to drop things on the daily, and mechanical pencils are no exception. However, dropping one can result in the tip being bent. I am no stranger to this issue and have tried numerous methods to fix it, including straightening it out, which only made it worse.
The right way to fix a bent mechanical pencil is with the help of a tool. This tool is a 0.5mm metal rod, usually available in stationery or hardware stores. It is made to be the ideal size to fit in the pencil tip.
Pushing the tip in different directions, with the help of the rod, will help you get rid of the bend. This is an easy method to fix the problem of a bent nib. However, if you find this complicated, you can always purchase a replacement nib. Find out the type of pencil you own, and get a nib that suits it in size and shape.
How To Fix Rotring Tikky Pencil

Rotring is a popular brand that manufactures high-quality stationery, including mechanical pencils. They usually last for a long time and are not prone to damage. However, accidents can happen, and you may find them with a bent nib or lead jam.
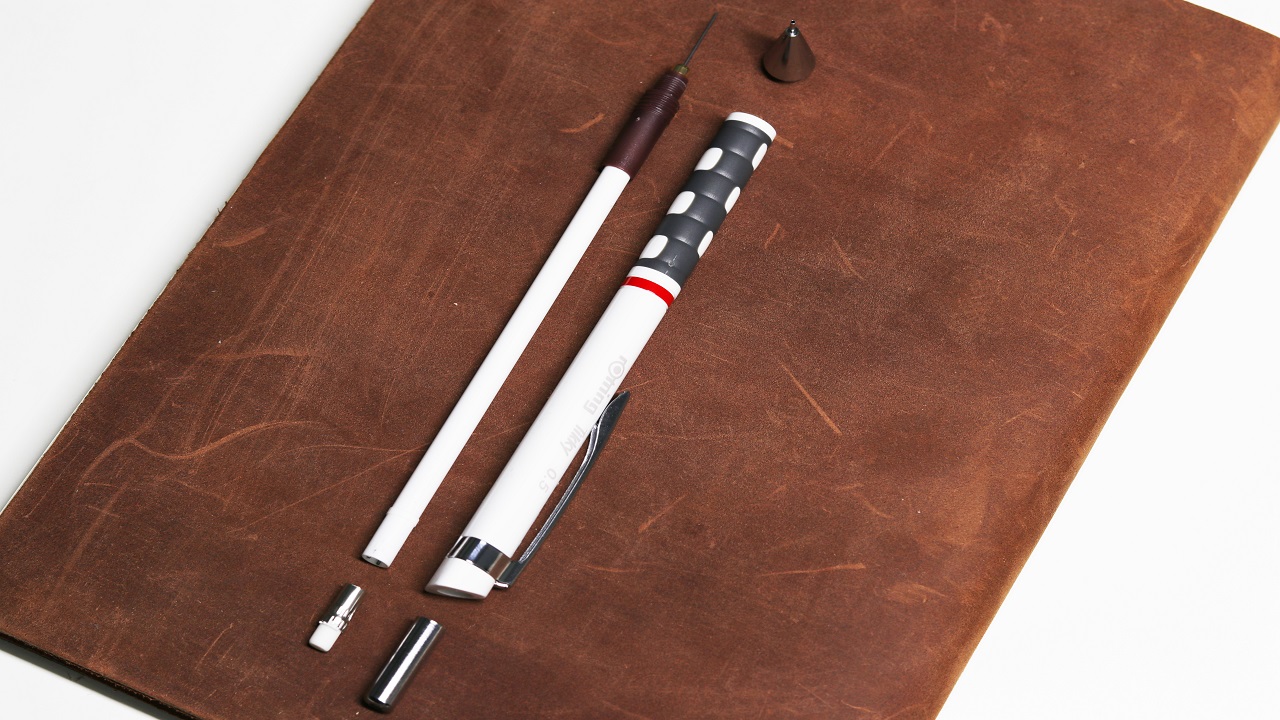
For the latter scenario, the fix is pretty easy. Rotring pencils are known to be dismantled easily, so you can follow the above-mentioned steps and clear off any hidden lead jam. However, with the issue of a bent tip, it can be quite tricky to fix.
You can use a 0.5mm rod to manipulate the nib back into a straight line. But the possibility of messing up and damaging the mechanical pencil is quite high. In such cases, contacting professionals or the Rotring customer service would be helpful.
How To Reassemble A Mechanical Pencil
If your repair work needs you to disassemble the entire pencil, putting it back together can be complicated. More so if you are not able to recall the dismantling process.
The initial step is to slide the lead reservoir into the thrust tube at the end of the pencil. Once you’ve attached it, you can work on the clutch mechanism and the metal/plastic ring. Find the flared part of the metal or plastic ring and insert it into the snap-plug end of the clutch mechanism, or chuck, while pushing the ring down.
Take the smaller end of the mechanical pencil body, and insert the snap end of the clutch while holding the pencil upward. Be sure not to let the clutch/chuck fall off. Slide the spring to the back end of the pencil body and insert the lead reservoir behind it.
Push it in place till you hear a snapping sound. Now, you can reattach the nib of the pencil and screw it in place. Finally, add a new piece of lead to the pencil, and you’re good to go!

How To Fix A Mechanical Pencil Final Words
Mechanical pencils have changed up the game with their functionality and style. However, the last thing you’d want to do is throw away your whole pencil just because of a small hiccup.
Unlike wooden pencils, mechanical pencils are prone to lead jams and bent tips. Both are easily solvable problems, and I hope this guide helped you with that. With that, I come to the end of this comprehensive guide. I hope you enjoyed reading it, and if you did, do check out my article titled “Mechanical pencil lead size comparison” and you’ll notice there are far more lead sizes than you’ve thought!


Thank you SO MUCH for this very helpful article. I fixed my favorite mechanical pencil and will go back later to my stash of broken mechanical pencils and fix them too–it will be great to have them back. I had wondered about that metal stick in my old mechanical pencils… 🙂