Have you ever used colored pencils to draw or create sketches? Then you know how much of a joy it is to work with them.
Many of us are familiar with colored pencils as a medium for drawing and sketching. They serve as an accessible coloring medium that is both simple and inexpensive. And thanks to their versatility, you can create stunning works of art!
Unfortunately, colored pencils are quite underutilized compared to some of the other coloring mediums, such as oil paints or watercolors. And due to this, many people may fail to realize their full potential when it comes to creating art.
That is why we have made this guide to highlight the coloring techniques with colored pencils that you can use. And once you go through it, you will come to understand precisely how flexible they are and how much this art medium has to offer. Shading with colored pencils might get easier and can invite you to the drawing board.
FUN FACT | Did you know colored pencils are not only made up of just wood and clay?
We have this excellent article on how colored pencils are made that explains it all.
So, without further ado, let’s dive right in!
Techniques For Coloring With Colored Pencils

When it comes to colored pencils, there are several techniques that you can use. Some of them are pretty basic, and you may already know about them. On the other hand, there are a few techniques that are relatively advanced and lesser known, even among professional artists.
Regardless, we will be covering most of them so that you can use them when creating your own art pieces.
A. The Basics
To begin, we’ll dwell on the basics because it is wise to have a good foundation before moving on to the more advanced methods. So, in this section, we will be covering some of the fundamental aspects of colored pencils.
1. Sharpening Your Colored Pencils
Like regular lead pencils, colored pencils need to be sharpened before use. However, the process of sharpening a colored pencil is slightly different than that for a lead pencil. This is because colored pencils have a softer core that is either wax, clay, or oil-based. On the other hand, regular lead pencils have a more rigid core made from graphite.
That is why you cannot simply sharpen colored pencils by putting them in a regular pencil sharpener. If you do that, they might break and jam your sharpener instead. So, you need to use specialized sharpeners designed explicitly for colored pencils.
Even then, you need to be careful when sharpening them because if you apply too much pressure, the tip will break. You can even avoid sharpeners altogether and use the old-school method of sharpening them with a blade or a knife.
Just consider the level of sharpness you want. If you’re going to produce fine lines, you will need to sharpen the pencil to a keen point.
Not all drawings benefit from a sharp point pencil, though. In some cases, a dull point may be more useful since it gives a more diffused color and can cover a larger area. And to get that, only a little bit of sharpening is necessary.
So, keep that aspect in mind when sharpening a colored pencil. Sharpen it to the point that you feel is comfortable, and you can get to coloring your art!
2. Type Of Colored Pencil
Before you start coloring with a colored pencil, determine its type. There are different types of colored pencils, each of which has a specific usage scenario.
The most commonly used one is the soft colored pencil, which has a clay or wax-based core. They can break easily, so you should be careful while using or sharpening them. Soft pencils are great for producing dense, opaque colors and can cover a large area with each stroke.
On the other hand, hard colored pencils have an oil-based core, making them harder than wax-based colored pencils. They don’t break as easily, due to which they are pretty easy to use and sharpen. These pencils are suitable for adding details and shading to your drawing.
Besides the above two types, you have water-soluble pencils, more commonly known as watercolor pencils. Their cores are relatively soft as well, but they can be used in both wet and dry conditions. When the pencil tip is moist, it will produce a light, thinned-out color that has a diffuse texture. Conversely, when the tip is dry, you can get denser, opaque colors.
There are other types of specialty colored pencils apart from the ones discussed above. You have color sticks, which have no outer wooden layer, which is why they are also known as woodless pencils. These are used for producing an intense color, even with minimal pressure. And of course, pastel pencils have a waxy coloring texture similar to pastels.
You should pick a pencil that best suits your coloring needs!
3. Pencil Pressure
The pressure you apply with the colored pencil is one of the most important aspects that you need to keep in mind when coloring. With less pressure, you will get a lighter color, and the more pressure you apply, the deeper the color will be.
However, if you are using a soft pencil, be careful not to apply too much pressure, or else the pencil tip may break. Even if the pencil tip doesn’t break, you might punch holes through the paper, thereby ruining your drawing.
We recommend that you start by applying a lighter pressure for the first few layers. You may increase the pressure gradually to get a suitable color shade or gradient.
4. Angle
The angle at which you hold the colored pencil matters a lot while coloring as well. If you hold the pencil at a shorter, acute angle, then you will be coloring with the side of the pencil core. And the strokes you make at such an angle will be relatively broader and more diffused.
In contrast, if you hold the pencil at a straighter angle, only the colored pencil tips will be in contact with the paper. That will give you a sharper stroke with dense color.
However, the sharpness of the pencil will play a part in this aspect. If your pencil has a dull point, the strokes will be relatively broad, even at 90 degrees. For really fine lines, you should sharpen the pencil in addition to increasing the angle.
B. Strokes And Color Application
Now that we have covered some of the basic aspects, it is time to address the different coloring techniques. So, in this section, we have covered the methods of color application. More specifically, we have discussed the pencil strokes that are used when coloring with these pencils.
1. Back And Forth Strokes
The back and forth strokes are among the most common colored pencil techniques. In fact, this is probably the first technique everyone learns when using colored pencils. It involves moving the pencil in a continuous back and forth motion without lifting the pencil from the paper surface.
So, it is relatively quick and easy to do and can be used for coloring a blank space pretty effectively. The back and forth motion is typically made in a single direction. But this is not mandatory, as you can change the direction at any time.
However, if you perform random back and forth motions, it may make your drawing look messy unless you apply dense color layering.
2. Hatching
Hatching is another common method used for coloring with colored pencils. This technique simply involves drawing parallel lines that are closely packed together. All lines are drawn in the same direction, and they may be horizontal, vertical, or diagonal. Once you start drawing in a particular direction, you should not change it as that will make the shading uneven.
It is an alternative method used for shading, and the lesser the space is between two adjacent lines, the deeper the shade will be. But the lines are not continuous like in back and forth strokes. So, after drawing each line, you have to lift the pencil from the paper. As a result, it can take some time to color using this technique.
3. Cross-Hatching
Cross-hatching is another coloring method that is very similar to hatching, as it also involves drawing closely packed parallel lines. However, in this coloring technique, all the lines are not drawn in the same direction.
This technique uses at least two layers of coloring. In the first layer, the lines are drawn in one direction, while in the second layer, the lines are drawn in the opposite direction. As such, it creates an interwoven pattern similar to a net.
If you wish, you can use multiple layers of parallel lines, with each layer running in a different direction. This is useful if you want the hatching patterns to be very closely packed.
Similar to the hatching technique, it is used for shading and for providing depth to your drawing. But you will get a comparatively deeper shade even if you increase the gaps between adjacent lines. The only trade-off is that you will need to add multiple layers to achieve that.
4. Swirling Or Circular Strokes
As the name suggests, this technique involves coloring in swirling or circular movements instead of directional lines like the previous methods. The circles overlap each other, and the more densely packed they are, the deeper your color will be.
Similar to the back and forth strokes, the swirling strokes are made without lifting your hand from the paper and are often done by applying light pressure. The technique is often used for coloring uneven or circular-shaped objects, but it can also be used for any other shape. And if you leave gaps between the swirls, it will give your drawing a textured look.
5. Stippling
If you want to add fine details to your drawing, then you may use the stippling technique. It involves making numerous tiny dots on your drawing paper by repeatedly tapping with your colored pencil.
In this regard, the thickness of the dot will be influenced by the pencil point. The dot you will get with a dull point pencil will be larger than the dot made by a sharp pencil. This method can be used to add depth to a certain part of your drawing.
On that note, this technique requires a lot of patience since adding numerous dots to the painting can be a daunting and time-consuming task. Also, you should be careful about the pressure you apply with the pencil. Continuously tapping the pencil with a strong enough pressure can break the tip easily, especially if you are drawing on a hard surface.
6. Shading
The technique of shading is a very effective method of coloring since it can be used to color large parts of your drawing in a short time. In this method, you have to hold your pencil at a very flat position and place the tip of your index finger close to the pencil tip.
Then rub the pencil against the drawing paper to create broad strokes of color that cover a wide area. On that note, you can create color gradients by varying the pressure on your pencil.
If you apply more pressure, you will get a deeper shade, and conversely, light pressure will produce a lighter shade. And since you have to support the tip with your finger, the chances of it breaking are also lower.
7. Other Types Of Strokes
Apart from the ones already discussed above, you can experiment with other types of stroking techniques for your drawing. Instead of circular or directional lines, you can stroke the colored pencil in waves, patterns, arcs, and so on.
You can even add tiny details to your drawing by making different types of creative markings. For instance, you can stroke in zigzag lines or make scribbles on your drawing to give it a unique texture and design. Or, in place of dots, you can add small dashes to add detailing.
Regardless, make sure to use some of your creativity to make your art unique.

C. Layering
You may have encountered the word layering a few times in our article before. It is a pretty common technique used in colored pencil drawings. This method is used to get a dense color without applying too much pressure.
With this technique, you can stack multiple light layers over one another to get a relatively deep color. And the more layers you apply, the darker the color will become. So, it is a more efficient method for getting a darker shade without breaking the tip of your colored pencil.
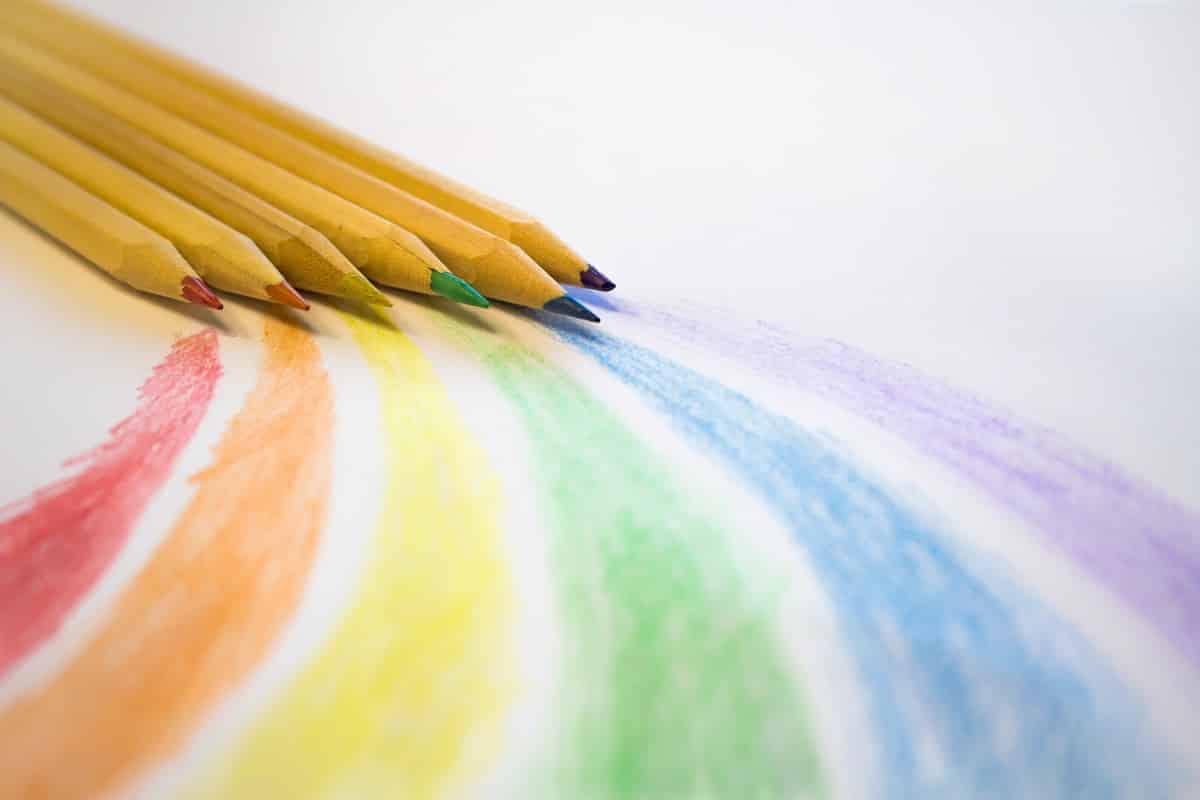
Additionally, layering can be used to mix different colors together. If you use different layer colors over the same area, you can get an entirely new shade.
For instance, if you layer the two colors: yellow and red, you will obtain the color, orange. The shade of orange you obtain can also be changed based on the layering. If you add one layer of yellow and two or more layers of red, you will get a deeper shade of orange.
D. Blending
Blending is a technique by which you mix two different colors together, which is somewhat akin to what is done in layering. However, there are certain differences in the blending process, due to which it is an entirely separate technique.
Layering can itself be considered to be a type of blending technique, which is usually done while the work is in progress. But as you already know, it does not always involve mixing two colors together.
The technique of blending is a more expansive process that can be done with the help of other tools in addition to colored pencils, such as brushes, mineral spirits, fabrics, and so on. And most of the blending methods are done typically after the drawing has been completed.
In any case, the different blending techniques that you can use have been discussed below.
1. Smudging
Blending colored pencils by smudging is relatively common and easy to do. In this technique, a piece of fabric or cotton swab is rubbed on the drawing to blend two different colors together. And you can control the blending by varying the pressure and frequency of rubbing.
2. Brushing
In this technique, the colors are blended together by using a paintbrush. Since the colored pencils are wax and or oil-based, the brush can effectively mix two colors together to create unique designs.
3. Using A Colorless Blender
A colorless blender is a clear colored or white pencil that is stroked over different color layers to blend them together. It can also be used to lighten the blend, making some details more visible. And the colorless blender gives a textured appearance to the blended colors, due to which you can create unique designs.
4. Using Mineral Spirits
Mineral spirits can easily dissolve the waxy or oil-based color of these pencils, thereby blending them together. Due to that aspect, this technique can be used to give your painting a diffused look.
E. Texturing
Texturing is a technique by which you can alter the texture of your drawing to create interesting effects. One of the most common methods for texturing with colored pencils is frottage.
In it, you place a textured surface below the paper when you color your drawing. That way, the texture of the surface below will be transferred to your paper. If the textured surface contains patterns or shapes, those will be transferred as well.
Besides, you can scrub sandpaper on your finished drawing or use rough paper to give it a textured look. Or, simply use another technique known as embossing.
In this method, you can use a sharp pointed tool to create indentations on the paper. You can do it on the white paper before you draw, and the indented pattern will become visible once the color is applied. It can be done after you finish the drawing since the waxy colors of these pencils can be etched easily.
F. Finishing Touches
Once you have finished the drawing, it is time to give it some finishing touches. In this regard, you can burnish the paint to give it a glossy look. For this purpose, you need to use a colorless blender and rub it over your colored pencil art. This will, in fact, get rid of any unnecessary white spots to give the painting a polished, seamless look.
You can also preserve your painting for a long time by applying fixatives. If you apply the final fixative, it will seal all the layers of your artwork, and you won’t be able to make any further changes. However, if you use a workable fixative, it will seal all the layers of the art, but you will still be able to make changes to it later.
Other Helpful Tips And Techniques
1. Using The Right Paper
To get the desired results, selecting the right paper is essential.
If you want to make a textured drawing, you need to use rough paper with medium to large teeth. But if you wish to create a smooth drawing, then you should use a smoother paper.
2. Using Stencils
You can make use of stencils with your colored pencil work to create attractive and unique designs. Place the stencil over the paper and color it with a pencil, and the patterns will be transferred to your drawing.
3. Mixing With Other Coloring Mediums
Colored pencils can be mixed with other mediums, such as watercolors and oil paints, or even markers and pens. This will help you add extra depth and detail to your work.

Coloring Techniques With Colored Pencils Frequently Asked Questions ?
Can you erase the color of the colored pencils?
It is not easy to erase the colors of these pencils since they are wax or oil-based. With regular erasers, you will only smudge the colors instead of erasing them. Instead, use a specialized vinyl eraser or electric eraser to remove the colors.
Can colored pencils be used on fabrics?
No, colored pencils typically cannot be used on fabrics since the fabric material cannot be colored easily. Besides, the colors may fade away if you wash the fabric.
How many colored pencils do you need?
As a beginner or a casual painter, you can get a colored pencil set that has 12 to 20 colors. On the other hand, a professional painter should have a set that contains at least 36 to 48 colors.
In case the color you want isn’t there, you can always create it by mixing different colors.
What to do if your colored pencil is running out?
If your colored pencil is running out, you can attach it to a tool known as a pencil extender. It is a plastic or metallic tool that will help you keep using the pencil.
Do the colored pencils fade over time?
Yes, the color of these pencils may fade over time. But if you preserve the drawing using proper fixatives and other methods, then the colors can be protected from fading for a very long time.

Coloring Techniques With Colored Pencils Final Words
It doesn’t matter if you are an amateur or a professional artist; you can use colored pencils to create really beautiful and vivid art pieces. And with the help of this guide, you can utilize some of the lesser-known techniques to make your drawing even more unique.
There is a reason why colored pencils are one of the most popular coloring mediums. You can experiment a lot with them, and if used correctly, it’s possible to create paintings that can rival watercolor or oil paintings. So, grab a set of colored pencils and get your creative juices flowing.
In the meantime, we will wrap up this informative guide. Until next time, we bid you farewell!


